2-step verification allows you to use your mobile phone as a second layer of security to access your Gmail account, and the POP email addresses you’ve linked to your Gmail account. You’ll need a phone that can receive text (SMS) messages, or you can opt to use a voice call.
What is the primary benefit of enabling 2-step verification? If someone successfully guesses or cracks your Gmail password with a computer other than your own trusted computer, you will receive a text message with a verification code. That verification code will be required to get into your Gmail account, so the would-be cracker will not be able to get in, and you’ll know that someone has attempted to log into your account, which means you’ll need to log in yourself as soon as possible in order to change your password. Of course, if you’re using this password for any other accounts, you should change it there too.
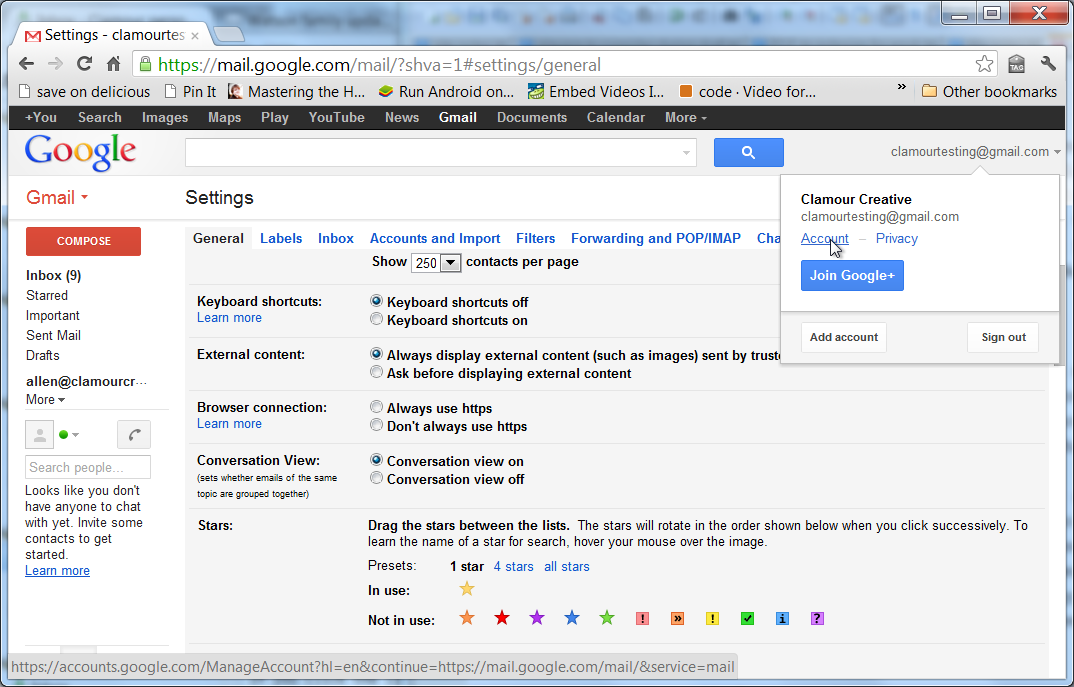
To set up 2-step verification, simply click on your Gmail address in the top right corner and select the Account option. A new tab or window will open and you’ll be in the Accounts section.
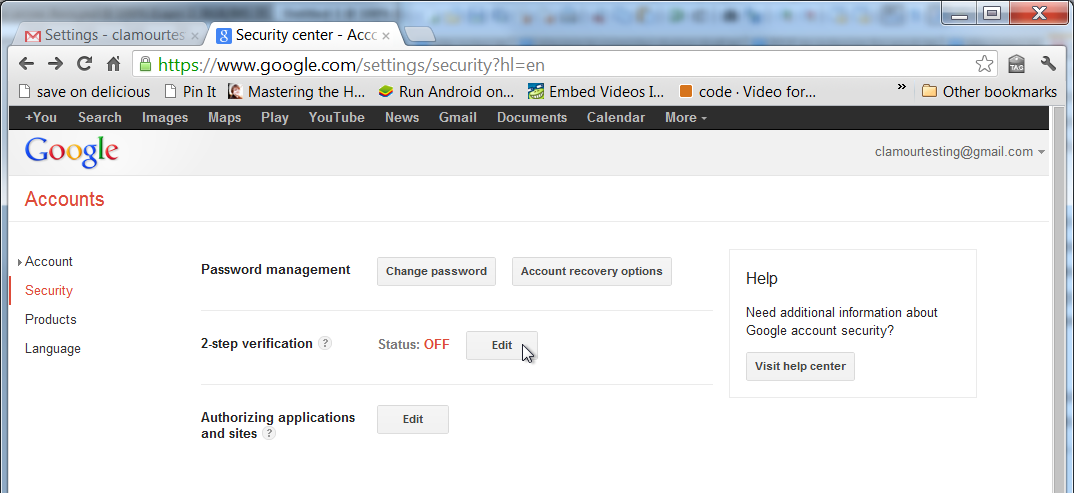
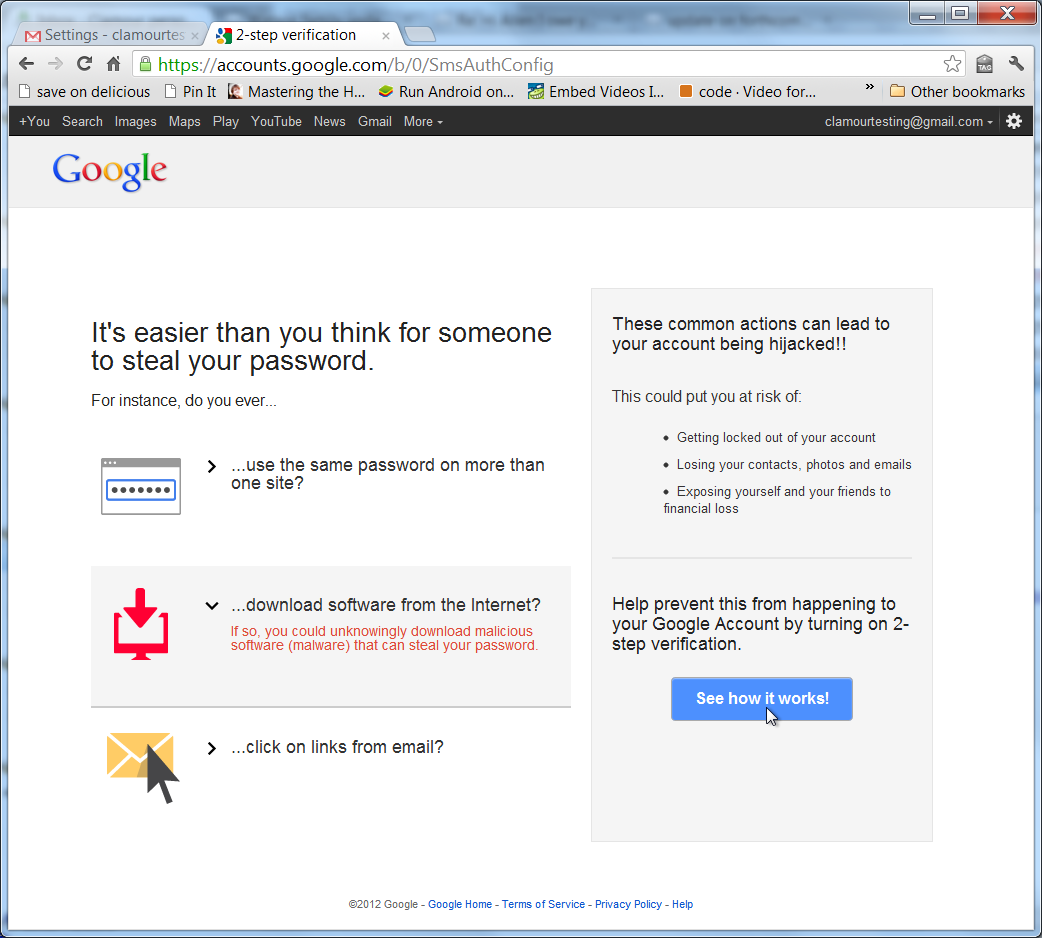
Click on the Security link in the navigation menu on the left, and click the Edit button beside the 2-step verification Status indicator. You will be asked to sign in again – this is an added layer of security. You’ll then be brought to an information page – you can click See how it works to get through to the next one, as well as the Start setup button on the following page.
Then, enter your mobile phone number in the space provided. Make sure the country code beside the phone number is correct, then click the Send code button. Google will send a verification code to your mobile immediately. Enter this in the space provided and click on the Verify button.
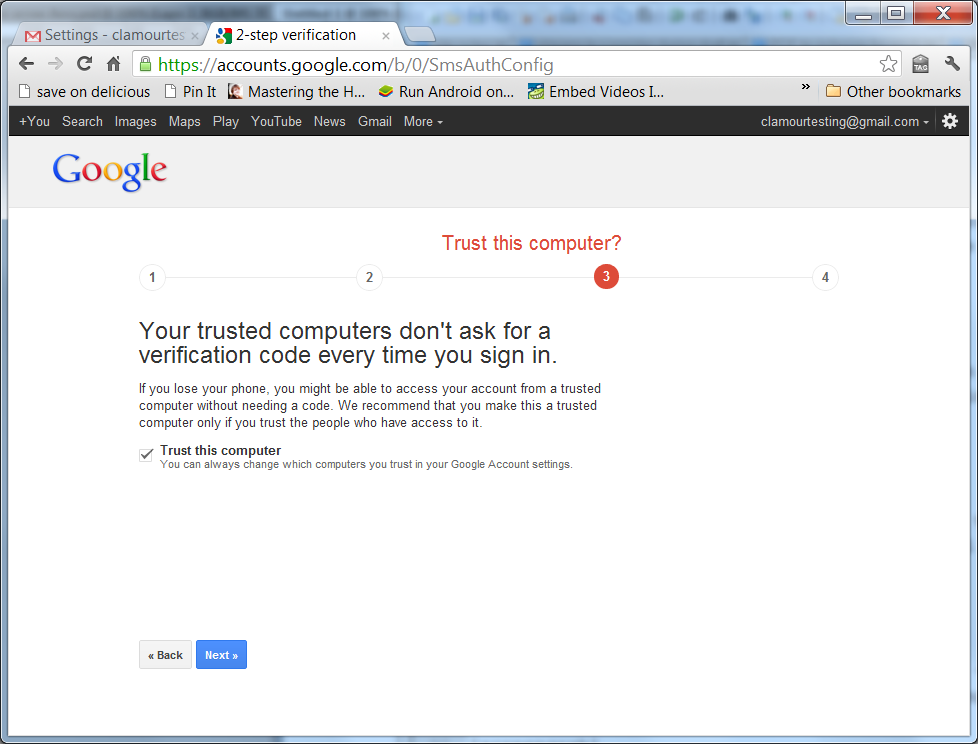
If you’re on your own computer, you can now check the Trust this computer box and click the Next button. This tells Google that they don’t need to send a mobile phone verification when you log in using this particular computer – though please note, you may receive a mobile notification if you log in using a different browser on the same computer.
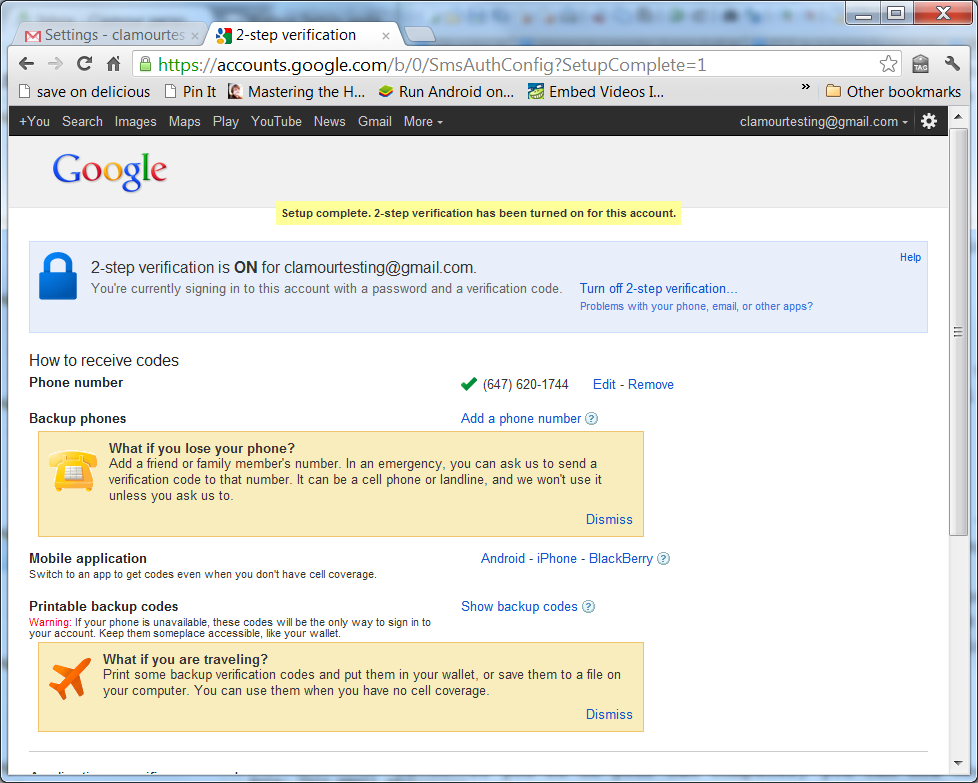
This final page offers various other options. For example, if you lose your phone, or you expect to not have access to it – when you’re planning to be on holiday, for example – you can print out backup codes to bring with you. You can also disable 2-step verification at any time.
Do you check your Gmail with other devices or non-browser applications? If you want to grant access to your phone’s email application or other third-party mail apps, including Microsoft Outlook, there’s another step. Click the Manage application-specific passwords link. You might be asked to enter your password again.
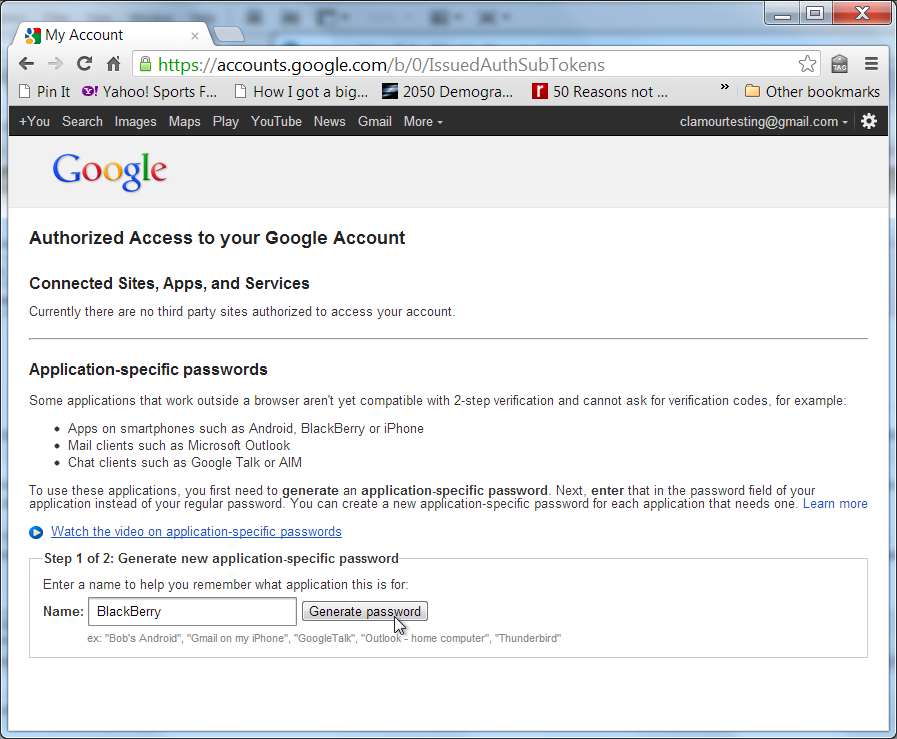
I still use a BlackBerry (for the time being, anyway) so I’ve named this new password BlackBerry. Click on the Generate password button.
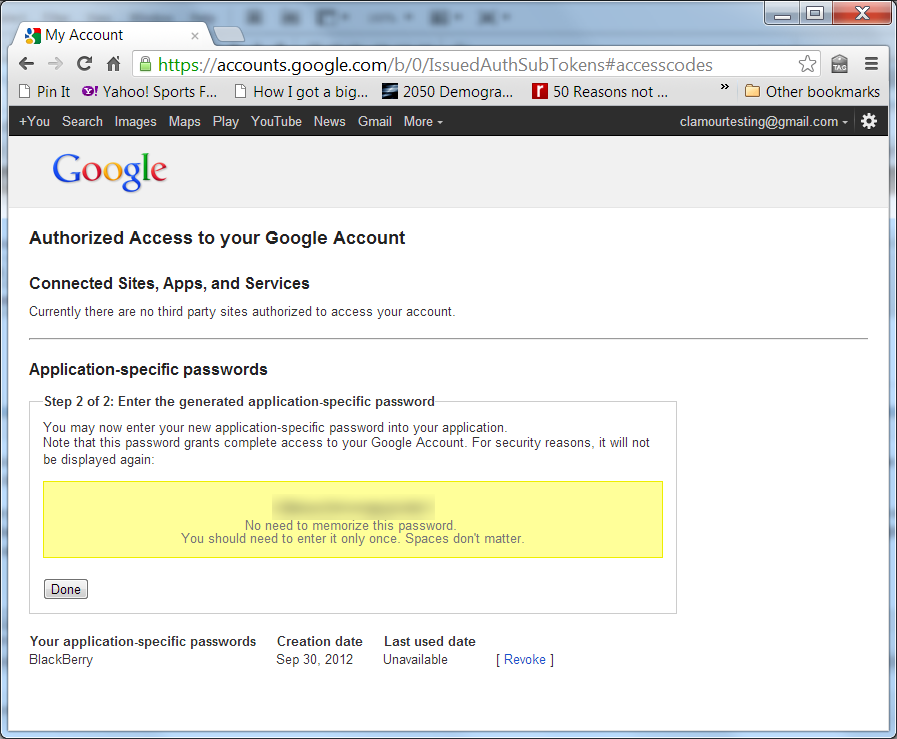
The password you will receive is a unique password that will grant the device of your choice full access to your Gmail account. You don’t need to remember it, because once you’ve entered this password on your device, the device will remember it for you. Now, if you ever lose your phone, you can simply log into your Gmail account from your trusted computer and use the Revoke link beside the name of your app-specific password. That password will never work again. Then, when you get a new phone, simply generate a new password following the steps above.
You can set up similar mobile-based security for your Facebook account as well. When logged in, click on the arrow menu in the top right hand corner, choose Account Settings, then click on the Security link in the left-hand navigation menu that appears. Click the Edit link beside Login Approvals, check the box and follow the instructions.
